 CoroCoro Comic Febuary 2012
This issue of CoroCoro has NO beyblade related info on its cover. So do note when you make purchase and look out for the big "2" on the side of the magazine.
CoroCoro Comic Febuary 2012
This issue of CoroCoro has NO beyblade related info on its cover. So do note when you make purchase and look out for the big "2" on the side of the magazine.
 This months issue reviewed some combo reccomendations using Diablo Nemesis X:D which was seen used in the recent Japan 4D bey tournaments. Combos include,
Diablo Unicorno 230R2F - Best Attack Combo
This months issue reviewed some combo reccomendations using Diablo Nemesis X:D which was seen used in the recent Japan 4D bey tournaments. Combos include,
Diablo Unicorno 230R2F - Best Attack Combo
This redition of the Bey, uses the weight of the Diablo MW and speed of R2F to power its attack. The additional factor would be the usage of the 230 Track, by using this track, the bey in overall is super effective against low attacking beys. Upon contact in battle the Diablo MW will tilt slightly and execute a 'Smash' attack from above. This is similar to last years bey champion combo, Basalt Kerbecs 230RS. As much as it is effective in Attack, it lacks greatly in Balance and Stamina.
Variares X:D - Best Balance Combo
The Auto Attack/Defence changing MW is combo-ed with X Drive. This combo only difference is switching the Delta Drive into a X Drive, not much of an impact except the original F bottom of D:D is replaced with X:D WF bottom, thus the Variares moves faster in the stadium. The Wider defensive surface area of the X:D Fusion Track/Bottom also adds defensive capabilities to the Combo when compared to D:D. A slightly tuned up version of the original combo.
 Diablo Pegasis BD145MB - Best Defence Combo
(Jap: Highest Weight and Performance Bey Combo)
Similar to the 'Heaviest Possible 4D Bey Combo", Diablo Kerbecs BD145MB. the review features a redition that replaces the Kerbecs CW with Pegasis 3 CW. Thou the Defensive Capabilities are similar, it is NOT the heaviest combo.
Diablo Pegasis BD145MB - Best Defence Combo
(Jap: Highest Weight and Performance Bey Combo)
Similar to the 'Heaviest Possible 4D Bey Combo", Diablo Kerbecs BD145MB. the review features a redition that replaces the Kerbecs CW with Pegasis 3 CW. Thou the Defensive Capabilities are similar, it is NOT the heaviest combo.

 The Pegasis 3 CW only weighs 3.12 grams when compared to Kerbecs CW which is 3.34 grams. But its just a minor tuned factor. Due to its generally heavier weight and BD145 Defensive capabilities, the Diablo Pegasis BD145MB is very difficult to tackle when in battle, making it the most defensive Bey around.
 The next page features the new upcoming Bey, BB-124 Kriess Signus 145WD.
(Jap: Attack deflecting Bey Capability)
 The Kriess MW is a unique 2-tier inter-flipable MW which have a semi-free spinning outer Ring. With this Semi-Free Spinning MW, the Kriess Signus is able to 'Evade' on coming Attacks by opposing beys.
 In addition to the Free Spinning MW Ring, the outer Ring also has a 'Slide' Capability. This slide motion 'absorbs' a Beys attack and then uses its 'free spin' to evade its Attack. Thus the "Deflecting" theory.
According to the report, it is virtually impossible to Attack the Bey head on when in max spin ratio and the Free Spinning MW makes the Signus outlast any stamina depleting 'Repeative Attacks' by opposing beys. Don't know how it will perform in Real time stamina thou.
In Attack Mode, where outer MW is flipped over and locked in place, the Kriess Mw becomes a high Upper Attack attribute MW.
In addition to the Free Spinning MW Ring, the outer Ring also has a 'Slide' Capability. This slide motion 'absorbs' a Beys attack and then uses its 'free spin' to evade its Attack. Thus the "Deflecting" theory.
According to the report, it is virtually impossible to Attack the Bey head on when in max spin ratio and the Free Spinning MW makes the Signus outlast any stamina depleting 'Repeative Attacks' by opposing beys. Don't know how it will perform in Real time stamina thou.
In Attack Mode, where outer MW is flipped over and locked in place, the Kriess Mw becomes a high Upper Attack attribute MW.
 The opposite page features the New Omega Dragonis 85XF which comes as a premium with the upcoming 4D Guidebook. Yes, the Omega MW is painted metallic blue. Looks like bladers have to get more than one to play and collect this rare exclusive bey.
 The following page features something new, A sneek preview of a new Bey Stadium, ZeroG~
 The ZeroG Beystadium seems like a 2-Tier 'Bowl-like' Stadium that tilts around while the Bey travels in it. Doesn't seem to have any KO gaps either, wonder how the beys fall out.
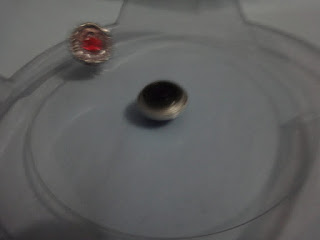
 The ZeroG stadium also comes with a New Bey, to be featured in the next issue, this Secret bey has a Red Crystal installed in its MW.( i wonder if it lights up ya.)
 In the Beyblade Comic section, the battle with Nemesis has reached to its climax and Ginga's Pegasis is Destroyed...again.
 The opposite page talks about the new 4D Dragonis Guidebook and also the new product release of 'Light Launcher LR' as an indiviual item. (used to come with Variares D:D).
Looking forward to BB-124 Kriess Signus 145WD and Omega Dragonis 85XF. Will review when they arrive~
The opposite page talks about the new 4D Dragonis Guidebook and also the new product release of 'Light Launcher LR' as an indiviual item. (used to come with Variares D:D).
Looking forward to BB-124 Kriess Signus 145WD and Omega Dragonis 85XF. Will review when they arrive~
Next in the release list.
 BB-123 Random Booster Vol.9 Fusion Hades AD145SWD
This Volume of Random Booster is yet another 'rare' series and packed with parts from DX sets, Game Exclusives and totally new CW and MWs.
BB-123 Random Booster Vol.9 Fusion Hades AD145SWD
This Volume of Random Booster is yet another 'rare' series and packed with parts from DX sets, Game Exclusives and totally new CW and MWs.
 Bey Combos in this Volume includes:
-Crash Escorpio 125JB (new MW)
-Bakushin Beelzeb T125XF (new CW)
-Meteo Ldrago 85LF Rush Ver.
-Meteo Ldrago W105JB Assault Ver.
-Hell Beelzeb 125XF (new CW)
-Cloud Lyra 85SF (new MW)
-Cloud Geminos T125SF (new MW)
and of course the Super Rare of this Volume,
-Fusion Hades AD145SWD (new Bey)
Bey Combos in this Volume includes:
-Crash Escorpio 125JB (new MW)
-Bakushin Beelzeb T125XF (new CW)
-Meteo Ldrago 85LF Rush Ver.
-Meteo Ldrago W105JB Assault Ver.
-Hell Beelzeb 125XF (new CW)
-Cloud Lyra 85SF (new MW)
-Cloud Geminos T125SF (new MW)
and of course the Super Rare of this Volume,
-Fusion Hades AD145SWD (new Bey)
 Contents Include:
Clear FaceBolt (blank)
Hades Clear Wheel
Fusion 3 part 4D Metal Wheel
Armor Defence 145 Track
Sharp Wide Defence Bottom
Stickers & Instructions
Tool
Fusion Metal Wheel
Contents Include:
Clear FaceBolt (blank)
Hades Clear Wheel
Fusion 3 part 4D Metal Wheel
Armor Defence 145 Track
Sharp Wide Defence Bottom
Stickers & Instructions
Tool
Fusion Metal Wheel
 Fusion Hades AD145SWD is one of the unique beys around in 4D due to its new type Fusion MW.
The Fusion MW is made out of a 3 part System, the MW core and a Double Sided manual mode change Ring MW which half is made of Rubber. Yes, a Rubber Coated MW.
Fusion Hades AD145SWD is one of the unique beys around in 4D due to its new type Fusion MW.
The Fusion MW is made out of a 3 part System, the MW core and a Double Sided manual mode change Ring MW which half is made of Rubber. Yes, a Rubber Coated MW.
 In Balance Mode, the Fusion MW hides most of its Rubber Surface below the MW Ring, revealing a Jaggered designed surface which is high in Repeative Attacks.
 When in Full Spin Ratio, the MW surprisingly shows alot of Recoil capabilities, this might be due to the 'Gaps' of Rubber Surface coming in contact with the opponents MW.
 Since Both Beys are Right Spin, the Impact direction of both the beys are opposite. When the opposing MW comes into contact with the 'sudden' Rubber surface in the opposite direction, its like swinging a Baseball Baton on a Moving Bicycle Wheel. The Baton will naturally be pushed away and Momentumn will be change. Therefore explaining the 'Recoil' Attribute in this Mode.
 When in Low Spin Ratio, the Fusion MW takes on it Repeative Attack, reducing in Recoil. This wears down the opponents Spin Ratio.
 In Defence Mode, the Fusion MW Rubber Surface is line on the Top half of the MW Ring, more Rubber surface area is revealed and the metal surfaces are hidden below.
 In Full Spin Ratio, the Rubber Fusion MW has, but lesser recoil when opposing an opponent of similar Track Height and appears to have some Absorbing or 'Spin Steal' Capabilities each time it contacts the opponent's MW.
 When the opponents MW comes in contact in the opposite direction this time round, its exposed to a 'Constant' Rubber surface intead of a 'Gap'. This is like slowly applying Brakes Pads to a moving Bicycle Wheel, slowing down its momentumn momentarily.
 This takes off Spin Ratio of the opponent gradually (and to Fusion itself also) resulting in the 'Spin Steal' Effect. It is recommended that the MW Rubber be 'seasoned' to a certain degree to see its full potential.
In the words of 'Spin Steal', many will relate it to none other than the only Spin Steal bey Ldrago. In fact the Fusion Hades is like the Right Spin version of the Ldrago. So what if this two were put in a battle?
To see the effects of the 'Spin Steal', both Beys were in AD130SWD configurations.
This takes off Spin Ratio of the opponent gradually (and to Fusion itself also) resulting in the 'Spin Steal' Effect. It is recommended that the MW Rubber be 'seasoned' to a certain degree to see its full potential.
In the words of 'Spin Steal', many will relate it to none other than the only Spin Steal bey Ldrago. In fact the Fusion Hades is like the Right Spin version of the Ldrago. So what if this two were put in a battle?
To see the effects of the 'Spin Steal', both Beys were in AD130SWD configurations.

 Surprisingly, there was quite some Recoil going on at max spin ratio but soon came to a 'silent' battle after the spin ratio lowers down. Both MW Rubber surfaces begin 'Stealing' from each other from the process. And results...
 Fusion Hades is still spinning in the end.
This is high chance due to the Fusion MW rubber surface percentage being more then that of Ldrago Destroy PC. Too add, Ldrago MW's Balance is quite bad and tends to tilt alot during the battle unlike the Fusion MW which is more stable when it comes to impact recovery.
Sharp Wide Defence Bottom
 Fusion Hades also comes with a new bottom part, Sharp Wide Defence (SWD).
The SWD is bascially a WD version of Hell Kerbecs Defence Sharp (DS) Bottom. But perfomance wise it works pretty much the same as Fang Leone's Wave Wide Defence (W2D). The set back is probably the height of the Sharp tip which causes too much tilt to the whole bey in general. A good but not great part to add.
Fusion Hades also comes with a new bottom part, Sharp Wide Defence (SWD).
The SWD is bascially a WD version of Hell Kerbecs Defence Sharp (DS) Bottom. But perfomance wise it works pretty much the same as Fang Leone's Wave Wide Defence (W2D). The set back is probably the height of the Sharp tip which causes too much tilt to the whole bey in general. A good but not great part to add.
 In overall, the Fusion Hades AD145SWD is a unique Bey due to its Rubber Coated MW design. This might introduce a whole new way of Blading strategy via 'Spin Steal' and Momentumn Diversion thru impact. Definately a MW to watch out for. The SWD on the other hand is not a big thing but adds to the WD variation family for now.
Extras
The RBV9 also comes with one new CW and 2 new MWs.
In overall, the Fusion Hades AD145SWD is a unique Bey due to its Rubber Coated MW design. This might introduce a whole new way of Blading strategy via 'Spin Steal' and Momentumn Diversion thru impact. Definately a MW to watch out for. The SWD on the other hand is not a big thing but adds to the WD variation family for now.
Extras
The RBV9 also comes with one new CW and 2 new MWs.
 The Beelzeb CW is a 'Bee-like' motif Clear Wheel. Circular in shape and its evenly distributed design makes it a well balanced low impact CW despite its low weight value.
 The Crash MW is the Hybrid MW version of the 1st Gen Non-Hybrid Bull MW, Very high in impact Attacks and Upper, but lacks in Balance and Stamina. Would say it pars with Mercury and Vulcan MWs in Attack Capabilities.
 The Cloud MW, following Crash is the Hybrid version of the 1st Gen Aries MW. Very light MW with a low Attack area. A good distablizer but lacks greatly in weight to make it effective. Yet to find any strong points to make this MW useful.
14 Beys in 1?

 BB-122 Diablo Nemesis X:D
Probably one of the most sophiscated bey ever designed. As reviewed in the previous CoroCoro Comic, the Diablo Nemesis is like a fusion of 14 beys, taking motifs of other beys and incorperating with its own design.
BB-122 Diablo Nemesis X:D
Probably one of the most sophiscated bey ever designed. As reviewed in the previous CoroCoro Comic, the Diablo Nemesis is like a fusion of 14 beys, taking motifs of other beys and incorperating with its own design.
 Contents Include:
Clear FaceBolt (Blank)
Nemesis Clear Wheel
Diablo 4D 2-Tier Metal Wheel
X Drive 4D Fusion Track/Bottom (X:D)
Light Launcher with Ripcord (Black)
Stickers and Instructions
Tool
Contents Include:
Clear FaceBolt (Blank)
Nemesis Clear Wheel
Diablo 4D 2-Tier Metal Wheel
X Drive 4D Fusion Track/Bottom (X:D)
Light Launcher with Ripcord (Black)
Stickers and Instructions
Tool
 Besides the Diablo MW system being the most sophiscated, it is also the only MW system that can 'combine' with the X Drive when used in its Active Balance Mode.
Attack Mode
Besides the Diablo MW system being the most sophiscated, it is also the only MW system that can 'combine' with the X Drive when used in its Active Balance Mode.
Attack Mode

 The Top MW layer lays on top of the Main MW.
 In Attack Mode, the X Drive is independent and can ONLY Manually change modes between XF and S by toggling a switch in the Track.
 To change modes (from XF to S), the switch will have to be pulled up and turned to place to reveal the S bottom.
 The Diablo Nemesis has an astonishing High Recoil Ratio when in contact with a opponent when in XF mode. The Recoil factor was so great that it almost self KOed in several occasions. The only factor that still keeps it in the stadium is probably its weight. In S Mode, the Diablo Nemesis is easily off balanced and due to its Uneven MW surface, it loses Spin Ratio very quickly. Not recommended for full Stamina play.
Active Balance Mode
The Diablo Nemesis has an astonishing High Recoil Ratio when in contact with a opponent when in XF mode. The Recoil factor was so great that it almost self KOed in several occasions. The only factor that still keeps it in the stadium is probably its weight. In S Mode, the Diablo Nemesis is easily off balanced and due to its Uneven MW surface, it loses Spin Ratio very quickly. Not recommended for full Stamina play.
Active Balance Mode

 In this Mode, The Top MW is flipped and contacts with the X Drive.
The highlight of the Diablo Nemesis would have to be its Active Mode Change system. This Mode can only be used with the Diablo MW. This is so as the X Drive makes use of the MW to change modes when coming in contact with an opponent's attack.
In this Mode, The Top MW is flipped and contacts with the X Drive.
The highlight of the Diablo Nemesis would have to be its Active Mode Change system. This Mode can only be used with the Diablo MW. This is so as the X Drive makes use of the MW to change modes when coming in contact with an opponent's attack.
 On the X:D there is a small switch, and on the Diablo MW is a Jaggered Gear to toggle the switch.


 When Rotated, the Jaggered Gear depresses the Switch on the X:D, and changes Modes from XF to S2D to S and vice versa from S to S2D and XF.
 As fantastic as it sounds, does it really work?
When put to test, the Diablo Nemesis functions in XF most of the time when launched in Full Spin Ratio. When an opponent Bey is introduced, it gets KOed almost instantly due to Diablo MW's high Recoil Ratio, but not much change was seen in the Active Mode Change system.
As fantastic as it sounds, does it really work?
When put to test, the Diablo Nemesis functions in XF most of the time when launched in Full Spin Ratio. When an opponent Bey is introduced, it gets KOed almost instantly due to Diablo MW's high Recoil Ratio, but not much change was seen in the Active Mode Change system.
 Tried again with a lower spin ratio and Diablo Nemesis was in S bottom configuration. Once again introduced an opponent bey and when the MWs came in contact, Diablo Nemesis Changed Mode! Ran the test for several times and found that the Active Mode Change function only works well in a lower Spin Ratio. That also explained why high spin ratio users are not able to see the Active Mode Change, less those using the high rev launchers.
 Overall, the Diablo is a very nice and sophiscated designed Bey, any collectors must have. Out of the Box in Attack Mode, the Bey works ok and have an extremely high Recoil Ratio, highly recommeded for Attack Combos. The X:D is gimmickly impressive but sluggish and inconsistant when it comes to performance. Sadly i would have to compare it to Variares MW gimmick defence system. Basically, its all over before you can see any Mode Change of any sort. Nonetheless, great bey to add to the collection.
Extras
Overall, the Diablo is a very nice and sophiscated designed Bey, any collectors must have. Out of the Box in Attack Mode, the Bey works ok and have an extremely high Recoil Ratio, highly recommeded for Attack Combos. The X:D is gimmickly impressive but sluggish and inconsistant when it comes to performance. Sadly i would have to compare it to Variares MW gimmick defence system. Basically, its all over before you can see any Mode Change of any sort. Nonetheless, great bey to add to the collection.
Extras

 The Diablo is the most heaviest MW in the 4D series so far at 51.73grams when compared to last season's Basalt MW at 47.83grams.
So heres the run down of the Most Heaviest Competitive Combo for the 4D season.
The Diablo is the most heaviest MW in the 4D series so far at 51.73grams when compared to last season's Basalt MW at 47.83grams.
So heres the run down of the Most Heaviest Competitive Combo for the 4D season.
 The old Maximum Series Heavy Weight Combo would have to be the "MF2 Basalt Kerbecs BD145MB" at 67.02grams (JP 1st Gen MW version, weight might vary depending on MW.)
Since the Kerbecs CW, BD145 Track and MB are still the Heaviest CW, Track and Bottom so far, just the Basalt MW is replaced with Diablo MW and...
The old Maximum Series Heavy Weight Combo would have to be the "MF2 Basalt Kerbecs BD145MB" at 67.02grams (JP 1st Gen MW version, weight might vary depending on MW.)
Since the Kerbecs CW, BD145 Track and MB are still the Heaviest CW, Track and Bottom so far, just the Basalt MW is replaced with Diablo MW and...
 There you have it, at 70.92grams "MF2 Diablo Kerbecs BD145MB"
The Most Heaviest Competitive Combo for the 4D season, not to mention that it CAN be used.
Performance-wise, I leave the testing to the fans ya~
There you have it, at 70.92grams "MF2 Diablo Kerbecs BD145MB"
The Most Heaviest Competitive Combo for the 4D season, not to mention that it CAN be used.
Performance-wise, I leave the testing to the fans ya~


